Hi!
Congratulations if you are here, you are either lost or now the proud owner of a FidgetThings Switch!
What is a Switch? Switch is a Fidget Clicker that utilizes an all metal body that secures a keyboard key switch with 4 screws and takes any MX Stem key Cap.
This allows the user to not only pick there preference in material for the body but also customize the Key Switch, Key Cap, and more!
This Guide will help you understand what is in your box, how to change key caps, change key switches, install lanyard loop/keychain, and understand when to use what size screw.
What is in the Box?

- x1-2 FidgetThings Switch
- x1 Loud and Haptic Key Switch
- x1 Selected Key Cap
- x2 M2x4mm Screws
- x2 M2x6mm screws (x1 if loop/keychain is bought)
- x1 T6 Torx Driver
- x1 Quiet and Smooth Key Switch
- x2 M2x6mm screws (x3 if loop/keychain is bought)
- x1 Didget

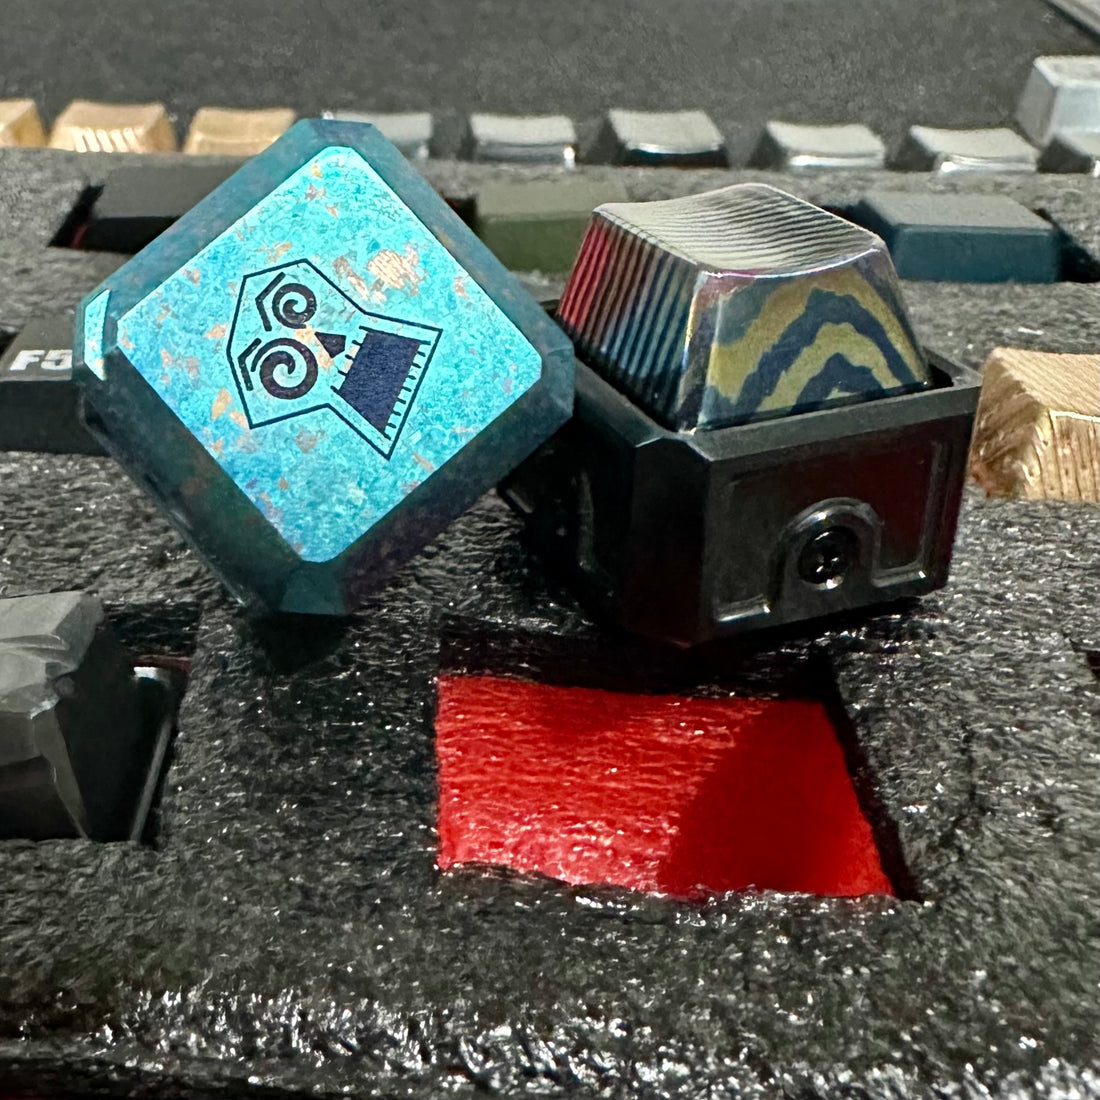
Why the two different size screws?
To put it simply, different switches have different designs. Below are 2 examples. One you can use 4 M2x6mm Screws or 2 M2x6mm and 2 M2x6mm screw and position your loop/keychain in any 4 positions and the other you must use 2 M2x6mm and 2 M2x6mm and the loop/keycahin can only go in 2 positions.


How to change key caps?
It is recommended that you get a narrow wire Key Cap puller (an Example is shown below). This is to avoid damaging your key cap, switch, and/or Key Switch. In a pinch you can use a credit card to slowly shim/pry off the cap or you can loosen your 4 screws about half way and remove the key switch and key cap entirely.


How to change key switch?
Simply loosen your 4 screws in the Switch body and remove the key switch. Insert new key switch and tighten the 4 screws. Please check which key switch style you have inserted to ensure you have the right screws in position.

How to install/remove Loop/Keychain
Insert Torx wrench through hole and gently turn, Lefty Loosey to remove, and Right Tighty to install. DO NOT OVER TIGHTEN, a gentle snug is all it takes. Make sure the loop is on the back or front of key switch orientation.

Inserting Stubborn Switches
If you find a Key Switch is being stubborn and being difficult to insert, typically the Key Switches that use the 2 short screws, then do the following:

after pre-fatiguing the clip retry and insert the switch as level as possible to slide it into position.
Linking Switch’s
Switches can be infinitely linked together against up to 3 of the sides at once. To do this you’ll need at least 2 Switch’s with all the guts removed and a Linking Kit. Is is best to start you link on the side holes of the key switch (holes that the short screws go into)

Once you have that follow the steps below


if enough force was applied the 2 switches should be linked together and should have little to no play unless you apply force to try and twist them. If they are loose and floppy or become this way as the spring adjusts, back out the Linking Screw and then repeat the last step.
Once you are satisfied with the linking you can re insert you Switch and and Key Cap and install the screws in the remaining holes.
Leave a Comment Below if I missed anything!